Four terracotta pot plant markers you can cut from one sheet of chipboard (plus the label I wish I'd skipped)
A single 12x12 sheet, four markers, and the one cut setting that keeps chipboard from crumbling. The basil label taught me why spacing matters more than I thought.
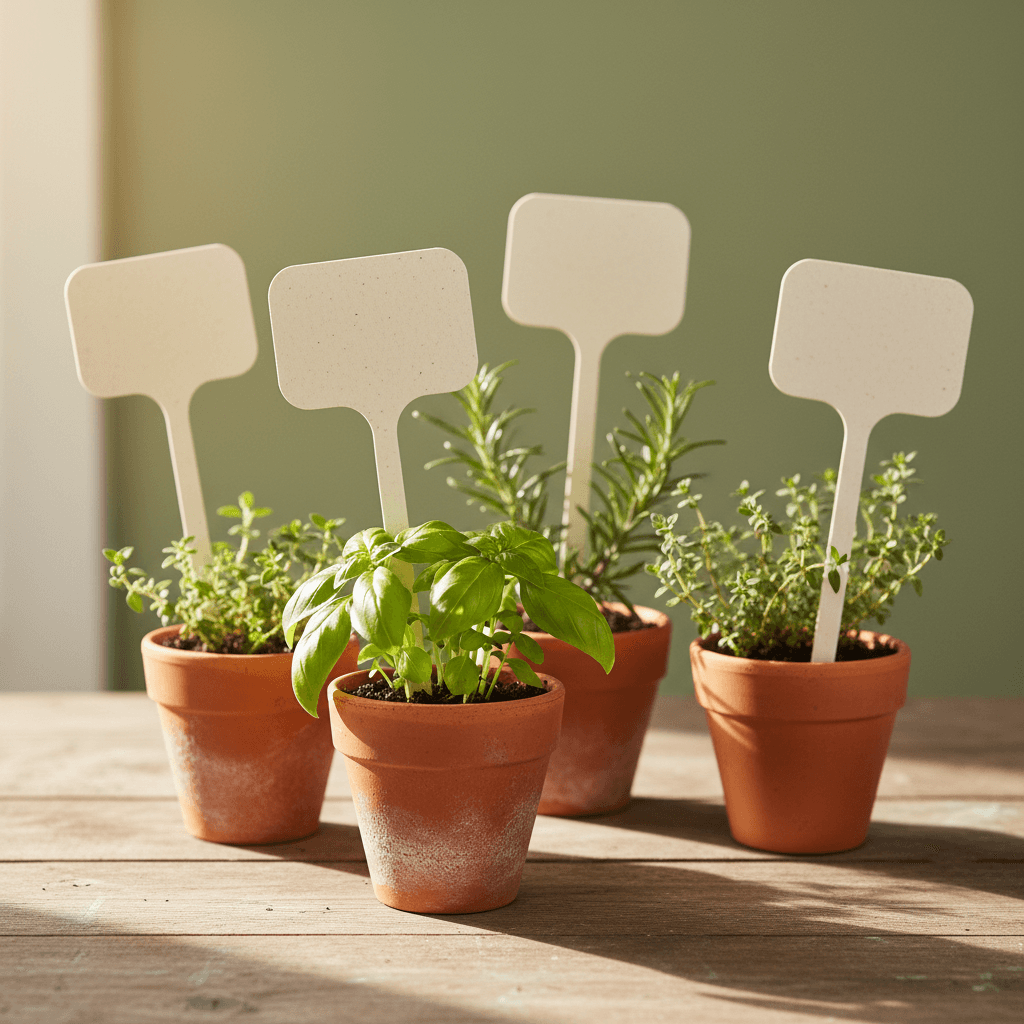
I bought a six-pack of herb seedlings at the farmers market last Saturday and realized I had zero idea which pot was basil and which was oregano by Wednesday. So I grabbed a single sheet of 12x12 medium-weight chipboard from the drawer and cut four plant markers in about twenty minutes. The basil one split down the middle when I pushed it into the soil, which taught me something about spacing I'm going to tell you about in a second.
What you need (and what you probably already have)
One 12x12 sheet of medium-weight chipboard. I used the Cricut brand stuff because that's what was open, but honestly the kraft chipboard from Michaels works just as well and costs about half as much. You want the kind that's roughly the thickness of a cereal box, not poster board.
- 1 sheet 12x12 medium chipboard (around $1.50 if you're buying single sheets)
- Fine-tip blade for your Cricut (deep-point works but you'll get rougher edges)
- StandardGrip mat that's still reasonably sticky
- Four terracotta pots, any size (I used 4-inch)
- A pen or paint marker for labeling (I used a Posca white paint pen)
- Optional: clear acrylic sealer spray if these are going outside
Total cost if you're starting from zero is maybe fifteen bucks. If you already have chipboard and a paint pen, it's basically free. Time from start to labeled pots sitting on the windowsill was about ninety minutes, and that includes the part where I had to recut the basil marker because the first one snapped.
The cut settings that actually work for chipboard
Set your Cricut to Chipboard, Medium Weight. Pressure on More. If your machine gives you the custom settings option, I run mine at depth 4 with pressure maxed out. The key thing is you want a clean cut all the way through without having to do a second pass, because chipboard gets fuzzy and weird if you cut it twice in the same spot.
I used a simple stake shape, about 1 inch wide at the top and tapering down to a rounded point. Total height was 5.5 inches so it sits about 2 inches above the soil line when pushed in. You can fit four of these on one sheet with room to spare if you rotate them in Design Space so they nestle together like puzzle pieces.
Why my basil marker split (and how to avoid it)
The first basil marker I cut had the text running vertically down the center of the stake. Beautiful. Clean. It split right down the middle the second I pushed it into the soil because chipboard has a grain direction and I put all the stress on the weakest axis.
Here's the thing nobody tells you about chipboard: it's basically compressed paper layers, and it wants to split along those layers when you apply sideways pressure. If your design has a long vertical element, the stake is going to crack along that line when you shove it into hard potting soil.
The fix is stupid simple. I moved the text to the top third of the marker and left the bottom two-thirds solid. No vertical score lines, no intricate cutouts below the soil line. The stake stays intact. I've had these sitting in pots for three weeks now and they're holding up fine, even the thyme one that's outside getting rained on.
Labeling them without making a mess
I tried a Sharpie first. It bled into the chipboard fibers and looked like a kindergartener wrote it. Posca paint pens are the move here. White on the natural kraft chipboard looks clean and cottagey. You can also use a fine-tip Sharpie oil-based paint marker if you have one lying around from another project.
Write the plant names before you seal them if you're sealing them. I learned this by doing it backwards and having the sealer make the ink run on the rosemary marker. Let the paint pen dry for about five minutes, then hit it with a light coat of clear acrylic sealer if these are going outside. Inside windowsill pots don't need it.
What to do with the leftover chipboard scraps
You'll have about half a sheet left after cutting four markers. I used the scraps to cut a set of small circle tags for my seed-starting trays, about 1.5 inches across with a hole punched at the top. Tied them onto the trays with jute twine and labeled them with the same paint pen.
Or save the scraps for layering under other projects. Chipboard makes a great backer layer for dimensional cards or framed vinyl pieces because it's sturdy and doesn't warp like cardstock. I keep a gallon Ziploc bag of chipboard scraps in my craft drawer and I'm always finding uses for them.
The one label I genuinely wish I'd skipped
I made a fifth marker for cilantro. Cute idea. The cilantro bolted and died four days later because it's July and cilantro hates heat. The marker is still sitting in the empty pot on my counter mocking me.
Anyway. Make these for the plants you know are going to stick around. Basil, rosemary, thyme, oregano. Skip the drama herbs. Trust me on this one.
These took me longer to label than to cut, which I think says something about how fast the actual Cricut part is once you get the settings right. I've made two more sets since the first batch, one for my neighbor who saw them on my porch and one for my mom's birthday. The chipboard holds up better than I expected, even the ones that get watered every day. Just keep the design simple below the soil line and you'll be fine.